
For Otakon 2014, I submitted a workshop a couple of months ago titled “Make it Work: Explore Japanese Street Fashion at Thrift Store Prices“. I promptly forgot about it and when the panel list came out and it wasn’t on it, I assumed it had been declined. Then a flurry of frantic emails about four weeks ago let me know that it had been chosen as a workshop, which is a separate list from the panels. I was excited, because while I’ve presented at Katsucon and Animazement, I’d never presented anything at Otakon. So I pre-registered and got to work.
The premise was to pull together 10 looks at $20 a piece or less, head to toe, and modify them to fall into the category of ‘Japanese street fashion’. I had a few topics I really wanted to address in this workshop, including:
1) The sheer waste involved in the fashion industry today and how clothing has become a disposable commodity that does an enormous amount of damage to our environment.
2) The social cost of the fashion industry, including child labor, poor working conditions and outsourcing.
3) The idea that you can save a lot of money with a bit of creativity. Limitless imagination within a limited budget.
4) That Japanese street fashion isn’t always about the crazy, wild, way-out-there looks. It’s about creativity and inspiration and pulling together a look that suits you and catches the attention of people around you.
The attendance was great, we maxed out the room capacity well before the panel started. Unfortunately there were some IT issues with the projectors that made it hard to present, but we worked around it.
Over the next few weeks I’m going to post all 10 looks along with some instructions on how I made them into something newer and more interesting.
For our first look, I started out with this. A gray and pink peace symbol t-shirt, a pair of jeans and a boring gray cardigan (not pictured).

What I started with, minus a generic gray cardigan.
The t-shirt was left behind by my niece, but the normal price for a t-shirt at my local Good Will is $3.50. The jeans were $5.50 and the cardigan was $3.50. The t-shirt and jeans are kind of cute on their own, but the t-shirt has a really awkward length to them that makes me think this is what I’d wear to the grocery store on a day when I forgot to wash my hair or brush it, not what I’d wear out to have fun.

Cutting off six inches makes a big difference in where your waistline appears.
So I measured and cut six inches of length off the bottom. I saved the fabric to reuse later on another project. This is a knit fabric, so it’s not going to unravel if you don’t add a new hem. I ran it through the serger to clean up the line of the bottom a bit, but it wasn’t really necessary.

A cute summer look doesn’t need sleeves.
Then I cut the sleeves off at the shoulder seams and re-hemmed them. The trick to taking any shirt or jacket to a sleeveless look is to cut the sleeve off at the seam and then cut an inch or two in along the shoulder seam before folding the sides under and sewing a new seam. This keeps the fabric from wobbling and puckering. Then just trim the extra fabric.
While I was at Michael’s, I found these three cute brassy peace signs for $0.99 on clearance. I picked them up and sewed them on along the neckline, which i liked a lot.
Let’s talk about the jeans. I found these at Good Will and they were already embroidered with this great flower and vine motif on the back, sides, front all the way down. It was love at first sight.

These jeans have a really cute motif embroidered on them.
I loved them the way they were, but it would have been easy to change them into skinny jeans, capris, shorts, even a skirt if I’d wanted to.

Deconstruction can be fun.
Next is the cardigan. I decided to deconstruct the cardigan along the shoulder seams, arm seams and the side seams, and then reattach with silver safety pins. I actually really love how this turned out as well and plan to do it again with colored safety pins on other types of clothing.

The finished look.
I paired it with a pair of black Doc Martens I already had, but shoes at Good Will run about $5.50 and you can find some great options.
I wish I’d had more time to find and style models for the workshop and I will be doing that when I present it again at other conventions (applications already in for Katsucon and AUSA). But I really love how it turned out.
This took about an hour for all of the work involved and the deconstruction and pinning is super easy to do while watching TV!
Total Cost: $13.50
Other Ideas: I’d love to find a way to paint/dye the white embroidery in a range of colors to look more like real flowers. That might be my next experiment.


 Series:
  Series:
  Series:
 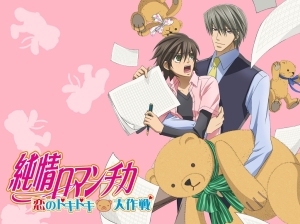 For the series details,
 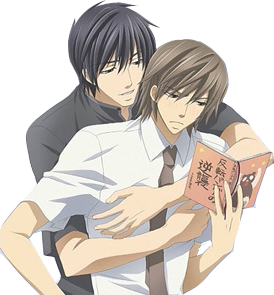 Hiroki Kamijo, a literature scholar, grew up with Usami as neighbors and had his own unrequited love for the other man. Just as he’s realizing that his love will never be returned, Nowaki Kusama blows into his life, turning everything upside down. When he disappears suddenly for six years, it almost seems as if what they’ve built will fall apart completely. But Nowaki is stubborn and determined.
 Yo Miyagi, a professor at the college Hiroki teaches at, is a divorced thirty-something man and shameless flirt when it comes to Hiroki. All of a sudden, his ex-wife’s younger brother, Shinobu Takatsuki, a high school student, blows back into his life and eventually his heart. But Miyagi is resistant to the idea of a same-sex relationship, especially with his ex-wife’s younger brother. Shinobu has a long road ahead of him to convince Miyagi to take a chance on him.
 I’m starting out my 2013 Anime Challenge with